Hardscaping - How to Edge with Stone
Hardscape is a gardening term used to refer to anything structural that is not a plant; ie, bird bath, trellis, rock wall, edging, art, etc. I have been wanting to add some sort of border to the front yard perennial beds for some time, but just haven't been able to find the right material. Most pavers are made of poured concrete that just don't appeal to me. I prefer soft lines and natural materials. During a trip to Home Depot a couple weeks ago, we spotted a new paver made of real stone and decided it would be the perfect hardscape material for edging the beds.
We aimed to edge along the lawn-facing side of the daisies.
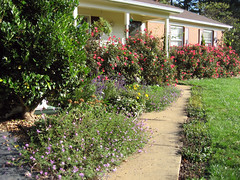
And last year's new perennial bed.

Step 1 - Outline the Path
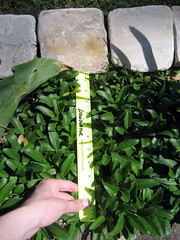
Carefully place each stone in its intended position, measuring the proper distance from a common anchor to ensure clean, straight lines. There is nothing more noticeable than a crooked line that was meant to be straight.
Here we measured to ensure each stone is laid 12" from the sidewalk.
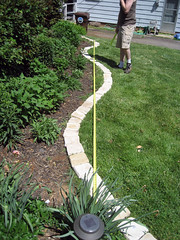
The perennial bed was a little tricky since it is a flowing line of two arches. We employed a bit of high school math by measuring the distance between each of the two arches to ensure they are equal.
 v
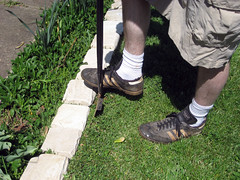
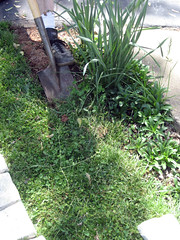
vStep 2 - Edge the Sod
Use an edging tool to cut a clean, deep line into the sod to denote where to start digging. A flat-head shovel could also be used for this step, but the edging tool is a little more convenient.
Once the line is cut, gather up the stones and set them aside.
Step 3 - Dig the Sod
The sod can now be lifted out of the ground with a flat-head shovel. Don't use a regular shovel, as the curved blade will ruin your clean line.
Smooth out the soil to create a flat, even foundation.

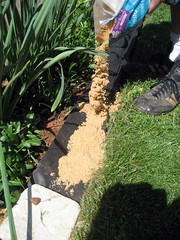
Step 4 - Prepare the Foundation
The whole purpose of edging a bed is to keep a clean, weed-free line. With that in mind, measures must be taken to prevent weeds from growing up between the stones.
Start by positioning a layer of landscape fabric in the newly dug trench. We doubled it over to provide extra protection.

Next, pour sand over the landscape fabric to create a level base for the stones.
Step 5 - Set and Level the Stones
Set the first stone in place, and add/remove sand beneath it as needed to create a level appearance.

Each successive stone is laid at the same level as the previous stone, as close to the previous stone as possible. Try to minimize the gap between stones to keep weeds from sprouting up.

This can be more difficult on curved areas. Try to keep the curve wide enough to reduce the required gap between stones.
Step 6 - Fill in the Gaps
Brush polymeric paver sand between the cracks of the stones. Do not use regular sand for this step. Polymeric paver sand hardens when wet. This prevents weeds from growing between the stones and keeps the stones in place.

Wipe away excess sand with a broom, then use the mist setting of the hose to water in the sand. Be gentle with the hose!
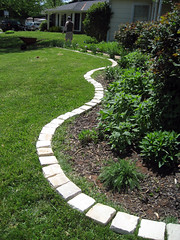
And the project is complete!


This project took us about 4 hours to complete, but the benefits will last a very long time.
Posted by Tammy and Ian @ 9:25 AM
0 Comments
![]()
![]()

0 Comments:
Post a Comment
Subscribe to Post Comments [Atom]
<< Home