Garden Beds!
We finished the garden beds two weeks ago and installed them the weekend before last. I meant to get the fence installed this past weekend and blog about the whole thing in one post, but it rained, and we weren't able to work on the fence. So, I'll just share the progress report.
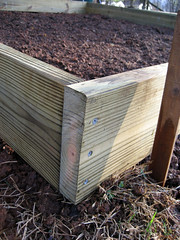
We started with 2" x 8" x 10' pressure-treated outdoor lumber that we then treated with Thompson's Water Seal. Last year the garden beds were 9' x 9', but because we could purchase 8' boards or 10' boards, we decided to expand each garden bed by a square foot and just use the 10' boards. We don't own a power saw, and cutting the boards down to 9' would be a little difficult with a hacksaw - LOL! However, once we saw how big a 10' x 10' garden bed would be, we realized it was too big. One foot doesn't seem like a lot, but it really is! Luckily, we found that one of our neighbors owns a table saw, so we borrowed it and cut the boards down by one foot. It wasn't all that difficult. I'm so happy to know they have a saw we can use, because we're going to need it again to rebuild the herb box.
After we cut the boards to size and waited for the water sealer to dry (it seemed like forever), we assembled the 9' x 9' garden beds using three screws in each corner. This wasn't all that difficult either. We thought this was going to be dreadfully painful, but it only took about an hour to assemble all four beds. They were REALLY heavy once assembled though! I pulled some muscles in my back moving them. Ian said I need to learn to lift with my legs. I thought I WAS lifting with my legs!!
We then laid the garden beds into their approximate positions in the garden.
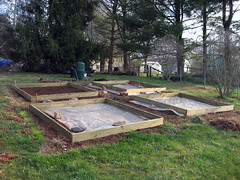
Using a tape measure, we lined the garden beds up so they were straight with each other and left the necessary amount of walking space between each bed. Next we made preparations to plunge the beds into the ground so they would stay in position. To do this, we used a shovel to "edge" around each bed in order to create an outline of where the bed was sitting. We then removed the lumber and dug a trench around the outline of the bed using the edging "cuts" as a guideline.
We then positioned garden cloth on the pathways of the garden, ensuring a 6" overlap into the garden bed to prevent weeds from invading the growing areas. We secured the garden cloth with garden cloth pins.
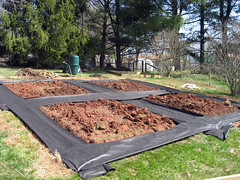
We positioned the lumber in their final position in the trenches.
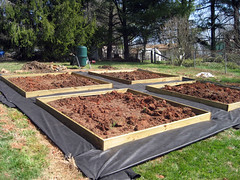
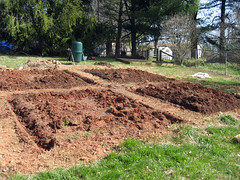
We filled in the trenches with soil and broke up the clumps of clay, grass and weeds. Although we had dug the beds out previously, we found that they weren't all 9' x 9', so we had a little more back-breaking work to do that day!
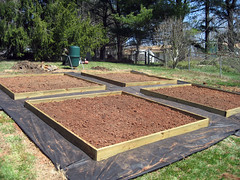
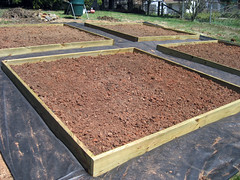
All that stirring up of the soil covered my 2" layer of compost with nasty clay. I was sad about that, but I think the beds look fantastic!
The next step is to edge around the entire garden with a shovel, tuck the garden cloth into the edging trench, push black plastic edging into the edging trench, install the fence and cover the garden cloth with mulch. We need to cover the garden cloth with mulch, because it is REALLY slippery when it gets wet.
The reason for the black plastic edging and the garden cloth is to keep down the weeds. The garden was just overcome with grass last year, so we pondered a permanent solution to weed prevention, and this is what we came up with. We'll see in July whether it is actually working!
I planted lettuce and spinach last weekend, and they have sprouted up successfully. I need to get the peas sown, but we are in the process of rebuilding the bean trellis. Maybe we'll work on that tonight.
Posted by Tammy and Ian @ 10:23 AM
2 Comments
![]()
![]()

2 Comments:
It amazes me the work you do! You have to really love gardening when you do so much. Are you planning to sell some of what you grow?
I do love gardening, and lucky me, my husband loves me enough to help! He's not so "in" to gardening, but he loves the product of it, so he helps me with whatever chores I ask him to help with. I don't think we will sell any of the veg. We thought we would have a huge surplus last year, but we really didn't. We canned a lot and gave some away to friends, but it turned out to be just the right amount.
Post a Comment
Subscribe to Post Comments [Atom]
<< Home