Wednesday, August 01, 2007

Freezing Beans

Green beans are a favorite in our house, so I grew a lot of them this year. In fact, I have a new crop just emerging from the ground right now. I like to keep a constant supply of beans throughout the summer and that means multiple plantings. They grow pretty fast, so it is easy to grow two crops over the summer.

Green beans produce a hefty bounty, and if you don't harvest the beans when they are ripe, the plants will stop producing. Since you need to preserve the beans you aren't going to use within a week of picking, we decided to freeze up our extras. I prefer frozen green beans to canned ones since they are crisper, and canning green beans requires a pressure canner (that we don't have), so freezing was our best choice.

Freezing green beans is really quite simple. We have a vacuum sealer, but you don't need one. You can store the beans in freezer bags and they will keep nicely.

First some advice on picking the beans. It sounds simple enough, but it can be tricky, because you really need two hands to keep from ripping the vine down from the trellis or snapping the bean in half. Use one hand to hold the bean at the base where the bean meets the vine, and the other hand to sharply twist the bean and remove it from the vine.
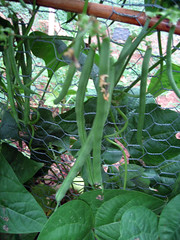
kentucky_pole_bean_6_28_2007

Make sure you wash the beans really well. You don't want to freeze dirt or bugs with the beans!
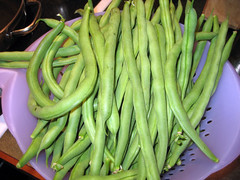
green_beans_7_2007

Snap off the ends, and then snap them in halves or thirds, depending on the size of the bean. Break them into bite-sizes that are manageable, but not too small, since really small beans might turn to mush when you cook them.
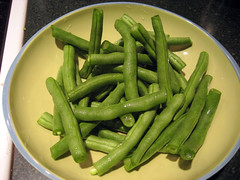
blanched_green_beans

Now you are going to blanch the beans. You will need a pot of boiling water, a bowl of ice water and your freezer bags.

Add a serving size of beans to the boiling water and let them boil for 3 minutes exactly. This doesn't cook the beans, but kills any bacteria that might be living in them. Remove the beans from the boiling water and place them in the ice water for another 3 minutes. This cools the beans down and restores their crispness. Now you can pack them up in freezer bags or use a vacuum sealer to store them.

Next year I'm going to interplant my beans with corn. I read that is how the Native Americans used to grow beans, and it sounds like a great idea. That will give me more room to grow other veg!

Labels: , , ,

Tuesday, July 31, 2007

When Life Gives You Cucumbers ...

We planted way too many cucumbers this year. Who knew that 8 cucumber plants would be too many? We have harvested over 50 cukes so far, and they are still coming. I think they are starting to throttle back a little though. Thank goodness! I've been pushing them off onto neighbors, family and friends, and we still have a crisper drawer full!

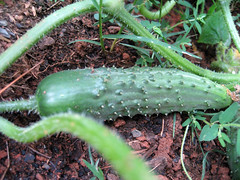
It was exciting to see our first cucumber forming on the vine in late June. Little did we know that they were plotting to take over the world!

cucumber_6_28_2007

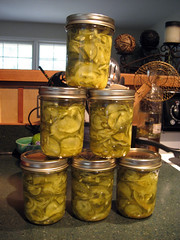
We decided to pickle and can some cucumbers, so we found a couple of good looking recipes on-line and set off. It was our first time canning. I hope we did it right! We haven't tried any of the pickled cukes yet, because they are supposed to set up for 1 month before eating. I guess this is to let the spices soak in.

This recipe is pretty basic; cucumbers, kosher salt, water, vinegar, sugar, celery seed, mustard seed, ginger, tumeric.

pickled_cucumbers

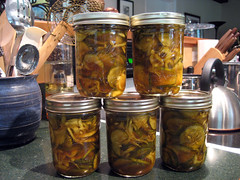
This recipe was a little more exciting; cucumbers, cider vinegar, curry powder, brown sugar, spices, etc ...

curry_pickled_cucumbers

We have also been eating them fresh with some salt or ranch dressing for dipping, and we have been making one of my favorite salads with cucumbers, cherry tomatoes, red onion, balsamic vinergar, oil, salt and pepper. Yummy!

I think next year we will plant just 3 cucumber vines, and I'm going to try to get them to climb a trellis so they don't crowd out the squash.

Labels: , ,

Friday, July 27, 2007

Drying Herbs

We have an awesome overabundance of basil and oregano in the garden. I have been pinching back the flowers to keep them from going to seed, but they have been getting more and more persistant with their desire to flower, so I decided it was time to harvest and preserve them. We have been trying to use them in every day cooking, but you can only use so many herbs, and we have a ton of them!

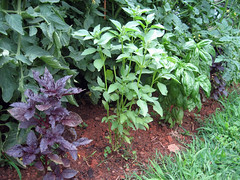
Here are the four kinds of basil we started from seed in late March. There is lemon, large leaf, red rubin and marseille. The seeds are from Park's culinary basil collection.

basil_garden_6_28_2007

I decided to dry them using a method I read about in one of my gardening books. Basically, you put them in the oven on a wire rack on very very low heat (like 80 degrees farenheit) for 24 hours or until they look completely dried out. If you can smell them cooking, the heat is too high. So I went about doing this only to find that my oven only goes down to 120 degrees, and they were baking at this temperature.

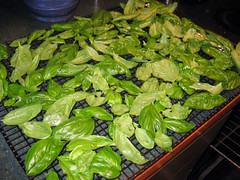
Here is the basil all spread out on a wire rack.

drying_basil_7_2007

Next I tried the microwave method outlined in my book, but that was a real pain! To dry herbs in the microwave, you sandwich the herbs between two paper towels and put them, along with a mug of water, in the microwave on 50% power for about 2 minutes. You have to keep checking their progress and adding more time. There are several problems with this method. First, my microwave resets itself to 100% every time it finishes, and I kept forgetting to set it back to 50%, thereby scorching the herbs. Second, you cannot dry many herbs at a time, because they cannot be touching each other on the paper towel, and you get really sick of hearing the microwave timer ding. This method was not my favorite.

Finally I remembered that we have a Ronco dehydrator stowed away somewhere in a forgotten closet! Duh! We bought it many years ago at a garage sale when we still lived in Mobile. It has only been used once, because attempting to dehydrate things in the thick humidity of Mobile is really quite futile.

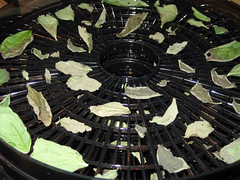
Here are the herbs spread out on one of the trays of the dehydrator. Some of them are already mostly dehydrated from their drying attempts in the oven and microwave.

basil_ronco_dehydrator_7_2007_b

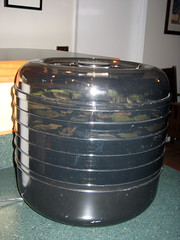
Here is a shot of the dehydrator at work. It really did a great job drying the herbs.

basil_ronco_dehydrator_7_2007_a

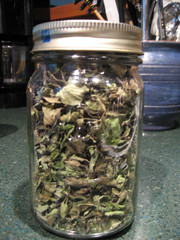
I don't know what we'll do with all this oregano! I guess we're going to be making a lot of spaghetti sauce!

dried_oregano_jar_7_2007

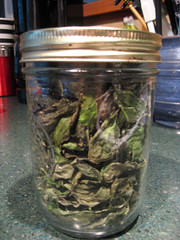
And a ton of large leaf basil.

dried_basil_jar_7_2007

I also dried some lemon basil, but I guess I did it after the photo shoot.

We still have a lot of herbs out there waiting to be preserved. We made some pesto and froze it a couple nights ago. I'll have to get some pictures of the pesto cubes, because they're pretty cool.

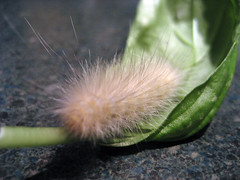
I found this cute little wooly worm on one of the basil leaves.

basil_wooly_worm

I know he's munching away and trying to kill all my plants, but he's just so cute! I released him onto some liriope that I don't much care for. He can eat all of it he wants!

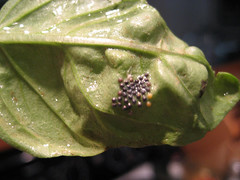
I also found some unsettling eggs on the underside of one of the leaves that caused me to have to check every friggin' leaf on each stem. Eek! I don't want to accidentally dry these guys and end up with them in my dinner. They're still pretty cool, even though they do freak me out...

basil_eggs_7_2007

Labels: , , ,