Thursday, September 20, 2007

Tumbleweed Composter

We bought this Tumbleweed Composter recently from a new local store downtown called Nest Organics. Nest Organics is a cozy little family-owned boutique specializing in organic products for the family and home. Among many other items, they offer beds, baby clothes and composting supplies. The family who owns it is very nice, and we were glad to be able to support them with their new store.

composter

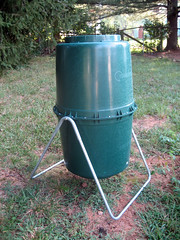
I was excited by this composter, because I read that you can create compost in as little as three weeks. Traditional compost piles take about 6 months to produce usable soil. Although the unit costs $200, if I can produce two $10 bags of compost every month, it will pay itself off soon enough, and we will have less garbage to throw out! Also, you're not a "real" gardener until you make your own compost! You may think $10 per bag is expensive for compost, but that is the going rate around Asheville, unless you purchase the junky bags of compost from Lowe's. I do not advise Lowe's compost though, as I have found it to be full of sticks and mold. Real compost is dark, soft, rich and loamy.

I filled the unit completely for the first time last weekend. I have been tumbling it every couple days, and I am seeing the vegetation already starting to break down. No, it doesn't smell bad, in case you are wondering.

I did have a bit of a scare last weekend when the composter collapsed as I was tumbling it. It turns out the nut that attaches the barrel to the stand wasn't screwed in tightly, as Ian put it together with just his bare hands. Hopefully it doesn't collapse again!

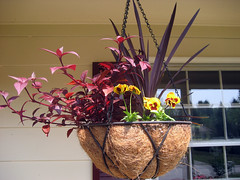
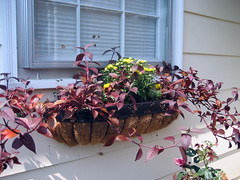
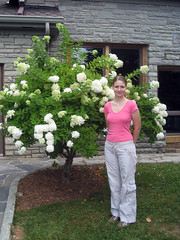
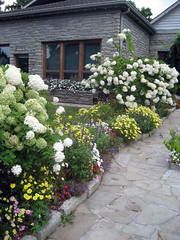
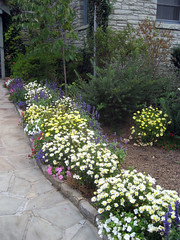
My Mother-in-law and I went this weekend to get some FREE PLANTS from a very sweet lady who was dividing up her overcrowded garden. This lady had the biggest compost heap I have ever seen! Her soil was gorgeous, as she has been enriching it for years with compost. I told her I recently bought a composter unit, and she rather scoffed at me for paying for a contraption when I could make myself a giant compost heap at home. I explained to her that giant compost heaps are not for people with dogs or people who live in a neighborhood on .39 acres! I seriously doubt my neighbors would appreciate a 20' x 20' compost heap brewing all Summer long!

There are a number of different composting bins for sale at hardware stores and on-line. You can also just pile up vegetation and garden scraps in a heap and turn it with a fork every now and then. Compost can be used to enrich existing soil and makes an excellent mulch, as it does not rob the soil of nutrients as it breaks down like traditional bark mulches do. I am going to use my compost to enrich the vegetable garden next year. We spent about $100 on peat this past Spring, and it will be nice not to have to lug 8 bags of peat from the car to the garden next Spring!

Labels: , , ,

Monday, September 17, 2007

Autumn Baskets

Autumn is really my favorite time of year. I love the crisp cool air, the chilly nights and mornings, and the warm golds, deep reds and brilliant oranges of the decor. I was inspired by the hanging baskets and potted arrangements at the Biltmore House and decided to do something more adventurous with my own Autumn baskets this year. I usually just stuff a mum in the center and call it done, but after my visits to the Biltmore, I just couldn't bring myself to be so mundane this year!

I found some gorgeous burgundy foliage and yellow pansies with complementing burgundy centers at Jesse Israel last weekend. The selection was pretty slim since it is the end of Summer, but the burgundy foliage matches beautifully with the new burgundy growth on the knock-out roses, so I felt pretty lucky to have found these plants. I put together this arrangement for my two hanging baskets.

autumn hanging basket

This was really a stretch for me, because I am generally a very symmetric person, but I absolutely love the asymmetry of this arrangement! The jagged spikes set off the soft scallops of the pansies and other burgundy plant (I can't remember the name) so nicely. I'm proud to have jumped out of my own little box of symmetry and into a new and exciting world of flower design!

For my side box, I chose more of the burgundy foliage and yellow pansies and added a beautiful yellow mum to the center.

autumn basket

The burgundy plants are tropicals, so they won't make it through the first hard freeze. I'm going to try to overwinter them inside so I can enjoy them again next Autumn. I am running out of "inside" room though!

Labels: ,

Friday, September 14, 2007

Fast-Growing Catmint

Here is the photo I posted of the catmint one month ago.

catmint and hydrangea

And here it is one month later.

catmint and hydrangeas

It has easily tripled in size, and that is without any "special" fertilizer; ie, Miracle Grow. I don't think I've fed these plants at all yet!

Not only are they growing fast, but the catmint I planted last Fall is spreading babies all over the perennial garden!

catmint propagates

Look at all those cute little babies.

catmint propagates

These offshoots are from seed, so if you don't want your catmint to spread, just keep it deadheaded, or pluck the little babies out of the soil before they get too big. I personally like the extra plants!

Labels: , , ,

What is this Clear Liquid Falling from the Sky?

Oh, it's rain! It's been so long that I had completely forgotten about it. I thought perhaps it had gone extinct or taken a long vacation in Barbados. Welcome home, rain! Don't be such a stranger in the future.

Labels: ,

Thursday, September 13, 2007

Italian Garden at Biltmore

The Italian Garden on the Biltmore Estate is probably my favorite garden on the property. I love water features, and with two large ponds full of koi, lily pads and other water-loving plants, the Italian Garden really delivers!

A statue of Diana, Goddess of the Hunt, is positioned on the landing between the entry to the Italian Garden and esplanade.

diana goddess of the hunt biltmore statue

This is a nice view of one of the ponds in the garden with the Biltmore House in the background.

biltmore house from italian garden

I love the different colors of lily pads.

lily pads italian garden biltmore

The ponds were stocked full of giant Koi. This white one was my favorite.

koi biltmore

Labels: ,

Wednesday, September 12, 2007

Reseeding the Lawn

The lawn has really taken some abuse this year. We tried to water it every now and then during the long drought, but with the expense of watering the vegetable garden and the increase in water rates, we were not able to water it enough to really help. So, here we are, reseeding the lawn.

Now is a good time to reseed the lawn, because the temperatures are dropping. Grass seed prefers a temperature below 80 degress for germination. Our temps are still a little higher than that, but it shouldn't last much longer.

Here is a view of the house from the road. This shot doesn't look "that" bad, except for our bushes that need a good pruning!

house september 2007

This is the worst area of the lawn. All that dead brown grass is really unsightly. Ian says the good news is that all the dead grass was nasty crab grass anyway, so it wasn't really a big loss.

reseeding the lawn september 2007

The view from the porch isn't all that attractive either!

reseeding the lawn september 2007

We had to cultivate the dead grass areas by hand, because the seed needs to be sown into soil and not on top of dead grass. That was not fun! It took about 8 total man-hours.

According to the lawn seed, you have to water it twice a day for 3-4 weeks. Ugh! That's probably going to add up to a lot more $$ than if we had just kept it watered throughout the year.

I will post weekly pics to keep an eye on the progress. It supposedly takes 3-4 weeks for the seed to germinate, and you aren't supposed to mow until the new grass is a couple inches tall. I think we are going to have to mow before that unless we want some anonymous letters from neighbors filling our mailbox!

Thursday, September 06, 2007

Now is the Time to Plant and Divide Irises

Although irises only need to be divided every 3-5 years, mine have become overgrown and crowded in their first year. The 3 bearded iris rhizomes I planted last Fall have multipled into 8 already, and since I planted them a little too close for comfort in the beginning, it is time to divide them. I also purchased 2 new bearded irises from the Biltmore Garden Center and 2 from the Jesse Israel Garden Center. I love irises! I was so excited to find REBLOOMING irises this year. Holy cow! I had no idea those existed! Now I get to enjoy multiple blooms in a single year. What could be better than that?

Here is one of my pretty purple blooms from this past Spring.

purple_iris_5_2007

To divide your irises, dig them up carefully and cut the foliage back to about 4". Wash their roots thoroughly with a jet of water from the hose so you can see the rhizomes clearly. The rhizomes look a lot different than the ones you planted originally, because they are not dormant like they were when you first planted them. Using a sharp knife, cut the rhizomes apart, being careful to leave each division with a nice-sized rhizome and plenty of healthy roots. You should NOT just snap them apart like I did. Although I knew it was wrong when I was doing it, it was just so easy and I could not resist - LOL! I'm sure snapping them won't kill them, but it's not the right way to do things. If any of the rhizomes look diseased, throw them out. Do not compost them! (You should never add diseased plants to the compost pile.)

Irises should be planted even with the soil surface. This means that the tops of the rhizomes should be exposed slightly while the roots are well covered and pointing downward into the soil. This makes me nervous, so I cover my tops with about 1/2" of soil. (If you live in a hot climate, the tops should not be exposed, but covered with about 1" of soil.) With divided irises, you need to be careful to spread their roots out adequately. To do this, dig a hole deep enough for the roots; ie, when holding the rhizome level with the top of the hole, the roots do not touch the bottom of the hole. Create a mound of soil in the center of the hole at a height just below soil level. Set the rhizome on top of the mound and drape the roots around the mound. Now, fill the hole in carefully with soil. Be sure to water the divisions well when first planting. Irises do not appreciate being over-watered, so only water during extensive droughts.

To plant newly purchased irises, I just sort of dig a hole and cover them up. The PROPER way is to build the mound and drape the roots, but the roots are always so rigid and short that this doesn't work for me. So, if your roots are long enough to drape over a mound, then use that method. Otherwise, dig a nice hole and lovingly cover the rhizomes with soil.

Although they look fragile, irises are actually very hardy and easy to grow. They also provide gorgeous foliage throughout Summer. If you interplant then with other perennials, they will provide a lovely scene Spring, Summer and Fall.

Labels: , ,

Wednesday, September 05, 2007

Now is the Time to Sow the Fall Crop

That's right! It may be September, and the nights may be getting cooler, but that doesn't mean the gardening season is over. It's time for the Fall crop! Fall is the best time to sow leafy greens like lettuce, spinach, arugula, and collards, and also many other vegetables that bolt in the heat of the Summer like beets, peas, radishes and turnips. Here is an extensive list of Fall seeds from Park Seeds. Your local garden supply center should have a fresh batch of Fall seeds for sowing, but if they don't, you can always find already-sprouted seedlings at your garden center or common places like Lowe's or Home Depot.

Lettuce seeds are particularly fine, and when sown in rocky soil like mine, they don't sprout so well. To remedy this, dig a narrow trough about 1-1/2" deep and 2" wide, and fill it with 1" of potting soil. Spread your seeds in the trough, then pat them gently into the soil. Now, fill the trough with 1/2" potting soil, water and watch the seeds grow! Mine sprouted in only 3 days using this method.

Labels: , ,

Tuesday, September 04, 2007

Blowing Rock, North Carolina

During our long weekend, we visited Blowing Rock, North Carolina. Blowing Rock is a popular tourist destination off the Blue Ridge Parkway about two hours from Asheville. We went shopping at the Tanger outlet and then strolled around the cute little downtown area for a bit.

This beautiful tree form Hydrangea must be the official "city flower" of Blowing Rock, since just about every yard in town has one or more of them planted. The next time we go back, I am going to stop at a local nursery there and buy one.

tammy blowing rock

They have taken great care in keeping their downtown area in full bloom. This is a nice mixed border featuring cone flower as a strong anchor plant.

blowing rock

I was not as big a fan of this mixed border. I think the plants are all too similar in height, and there just isn't enough green for me.

blowing rock

This mixed border isn't really my style either, but the plants are all very healthy and lovely on their own.

blowing rock

Whoever is responsible for tending the gardens around Blowing Rock is doing a great job. Despite our recent drought, they all look great!