Friday, June 25, 2010

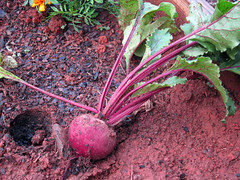
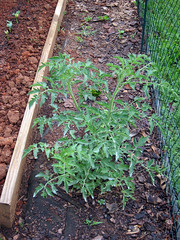
First Squash of the Season

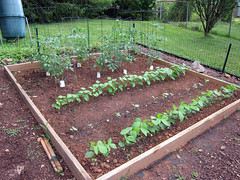
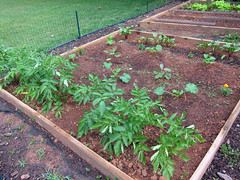
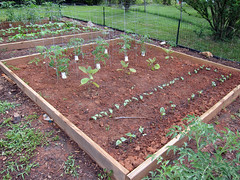
I had a lot of miscellaneous squash seed left-over from past gardening years that I decided to use up this year before adding to the collection. I ended up with 3 Crookneck Improved from Park's Seeds, and 2 Golden Dawn and 1 Raven Zucchini from Renee's Garden. I really like the Golden Dawn (pictured on the front row). Not only is the buttercup flavored fruit rich and nutty, but the upward curving leaves are easier to inspect for squash beetles than other varieties. This variety also seems to be able to pollinate itself from all female flowers. There are 5 fruit on each plant, and no male flowers. Most squash require male and female flowers to produce fruit.

bottom left quadrant early summer

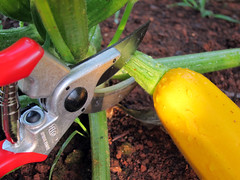
We had a wonderful rain last night that helped ripen up the first of the Golden Dawn fruits. Summer squash is ready for harvest at 5 or 6 inches in length. Do not let the fruit grow much longer than this, or it will become tough and bland. Harvesting the fruit young and often will keep the plant producing for a longer period. Remember that squash plants are annuals, and their goal is to produce seed. Once they feel enough seed has been produced, they will die. It's your job to keep them from fulfilling their goal!

golden dawn squash ready to pick

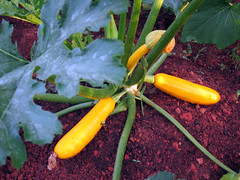
When harvesting, never twist or snap the fruit from the vine. Use a knife, sharp scissors or pruning sheers to make a clean cut leaving about 2" of stem attached to the fruit. This will help the squash stay fresh longer after removed from the vine.

cutting squash from the vine

Squash will become exhausted in the heat of the Summer and start to die back. To keep the garden full of squash all season long, sow a second crop in large peat containers around the time the first crop starts producing fruit. By the time the first plants die back, the second crop will be ready to take their place in the garden.

Labels: ,

Friday, June 18, 2010

Beets - From the Garden to the Table

I never liked beets as a kid. Maybe it's because my Mom tried to pass off mushy canned beets as being edible, or maybe it's because I was overly picky. Whatever the reason, I hadn't eaten a beet in many years until I found them in my salad last Fall at Bouchon. At first I thought I would pick them out, but I trust Michel's preparation of cuisine, so I hesitantly slipped one in my mouth, prepared to spit it into my napkin when no one was looking. To my surprise, it was the best thing I ate that night - so sweet, so juicy - so full of earthy goodness. I was in love and vowed at that moment to grow beets the following Spring.

I sowed a 9' row of Red Cloud Hybrid Beets in late March. Beets are a cool weather crop that can handle a bit of frost and should be sown in early Spring as soon as the soil can be worked. There is no need to fuss with sowing beets indoors and attempting to transplant them - just sow them right in the garden. Follow the directions on the seed packet - sow them shallow and give them enough space to grow. Since beets are a root crop, they need an airy soil that will enable unrestrained growth. I replaced about 50% of my heavy clay soil with compost to ensure the beets had enough breathing room. This variety matures in about 60 days.

growing beets

Beets are ready to harvest when they have reached about 2" across. Be sure to pick them before they get too big; otherwise, they will lose their flavor and become really tough. The fat round root and fresh leafy greens are both edible, making for a wonderful salad when paired.

picking beets

Beets are pretty tough when they're raw, so it's best to give them a light sauteing to soften them up and bring out their sweet flavor.

To prepare the beet for cooking, wash thoroughly, and then cut the leafy greens free of the root and snip off the long tap root from the bottom.

preparing beets

Using a potato peeler, peel off the tough outer skin to reveal the bright red juicy goodness beneath. It's best to wear gloves or slip a baggy over your hand while doing this since the red juice can stain your hands and clothes.

peeling beets

Slice the beets up however you want to eat them. Some people like to cube them, others like them in little sticks. I prefer half discs. So pretty, just like little red rainbows!

slicing beets

Saute for a couple minutes in a bit of olive oil over medium heat, then add a splash of white wine. Reduce the heat and cover for 10 minutes until very tender.

saute beets

Beets can be eaten warm or cold. I prefer them cold, so I stick them in the refrigerator for about 15 minutes when they have finished cooking.

The greens can be eaten cold in a salad or lightly sauted and served warm. To saute, add a bit of olive oil to a warm pan and cook over medium heat until the leaves shrivel to your liking.

saute beet greens

We served our beet greens under chicken with chilled beets on the side.

beets with chicken

I will be sowing a second crop of beets in late Summer for Fall harvest. Beets can be stored for up to two weeks in the refrigerator. I have never tried to freeze them, but I might saute some up and give it a try.

Labels: ,

Friday, June 11, 2010

Reporting for Duty!

The first time I heard the word "volunteer" in terms of gardening was from Ian's granny describing cosmos that were growing in a place she had not specifically planted them. They had "volunteered" themselves to grow! I thought it was a really cool word and started using it myself. Not everyone uses this word, so I'm passing it on to you (if you weren't already familiar).

Each year I get hundreds of volunteer tomatoes that grow from the seeds of the previous year's fallen tomatoes. I usually just hoe them out of the soil, but this year I'm going to let one grow.

This costuloto volunteered himself to grow in the mulch at the bottom right of the garden bed! He already has a cute little fruit forming, and is stronger than the plants I set out in late May. How could I possibly hoe him out when he has such a strong will to serve me some tomatoes!

volunteer tomato

Labels: ,

Thursday, June 10, 2010

Hydrangeas

Year four has started out great for the hydrangeas! Their sturdy branches are already bursting with multi-colored blooms, and the bees are loving it!

perennial garden late spring

Endless Summer opens with a green flower head, which turns pink, purple and blue.

endless summer hydrangea late spring

Blushing Bride opens with a similar green flower head which turns white and blushes to pink, purple and blue as it ages.

blushing bride hydrangea late spring

These shrubs receive just 2 hours of direct sunlight, one hour in the morning and one in late afternoon. From the look of things, they seem to enjoy their homes!

Labels: ,

Wednesday, June 09, 2010

Tropical Planters

I decided to move the jumbo fern to the far side of the porch this year so guests are not accosted as they try to enter the door. I figure the knock-roses and primrose impede their path enough that if they have to fight past the fern too, they might just give up and turn around. While this is a good plan for people selling meat out of the back of their truck, I would like friends and family to make it into the house, at least when they're invited - LOL!

porch view late spring

I was really fond of the firecracker fuchsia I found at the Herb Festival last year, and while I intended to dig it up before Winter, my intentions fell short. Thankfully the same vendor offered the variety again this year. Paired with New Guinea impatiens, bacopa and a succulent houseplant, this potted creation has a tropical feel that makes me crave a mojito!

tropical planters late spring

I'd like to find a low profile bench for the porch, where I can enjoy my mojito alongside my little bit of the tropics.

Labels: ,

Tuesday, June 08, 2010

Perennial Power

I'm very happy with the "English cottage" garden look I've got going on in the front of the house. While I still haven't ripped out the evening primrose, things are coming along quite nicely.

perennials late spring

The right side is my pride and joy at the moment. Knock out roses create a lovely background for bee balm, goldenrod and phlox, which sets the scene for yarrow, veronica, coreopsis, butterfly weed and asiatic lilies. I would like the bee balm and goldenrod to take a chill pill and quit growing before they completely block the roses, but you can't control an English cottage garden! I'm eager to see some blooms from the taller plants too, but I can wait ...

perennials late spring

The "out of control" ratty nature of the primrose adds to the look in this bed, right? Phlox towers proudly in the background as shasta daisies and coreopsis open the show.

perennials late spring

I am determined to rid the bed of that primrose soon, but I have yet to decide what will replace it. I'm leaning toward yarrow and foxglove, but I am easily swayed by the abundant choices at the plant stores right now!

Labels: , , , , ,

Monday, June 07, 2010

What's Growin' in the Garden?

It has taken me a little longer than usual to get the garden in this year, but it is finally complete!

garden late spring

Sugar snap peas, lettuce and corn rule the top left quadrant. I planted a new type of sugar snap peas this year, hoping they would produce bigger yields, but they have grown slower than ever! The plants are only 2' tall after 3 months in the garden. They do have peas on them, but the harvest is going to be pretty sparse.

garden late spring

Costuloto tomatoes, cupid tomatoes, yellow wax beans, okra and edamame take dominion in the top right. This is my first year growing okra, and I'm pretty stoked! Ian loves to make gumbo, and I love to fry it up!

garden late spring

Beets, squash, eggplant and potatoes rock the bottom left. The potatoes are trying to recover from the colorado potato beetles, flea beetles and what seems to be a touch of some disease. I lost one plant so far, but I'm trying to save the rest.

garden late spring

Jubilee tomatoes, costuloto tomatoes, cupid tomatoes, eggplant, cucumbers, turtle beans and lima beans hold down the bottom right. This is my first year growing turtle beans and lima beans. We're going to dry the turtle beans since we love dark black beans in the winter.

garden late spring

This is the first year I split the tomatoes into two quadrants. I did this so I could reach them easier for watering and anti-fungal spraying. Hopefully this will help me stave off blight a little easier than the previous two years. I started an anti-fungal spray two weeks ago on the tomatoes, and noticed yesterday a couple black spots on some leaves. Fingers crossed that it is just a touch of sun scald!

Labels: