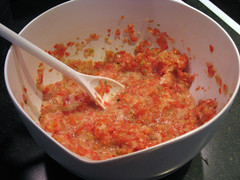
Friday, August 28, 2009

Roasted Tomato Soup

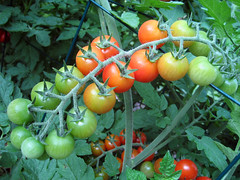
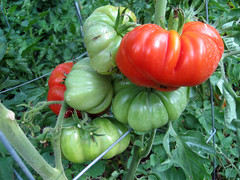
For the past two years we have juiced up our tomatoes and transformed them into rich pasta sauce, which we canned up for later use. This has worked out well, providing us with pasta sauce all year long. In fact, I still have two cans left from last year. I thought about doing something different this year, like maybe canning up a tomato soup, but I didn't really feel like peeling and de-seeding tomatoes, so I went in search of a tomato soup recipe that doesn't mind all those peels and seeds.

I found a tasty looking recipe for Roasted Tomato Soup at 101cookbooks.com, an amazing recipe blog.

It turned out ok, but I don't think I'm going to invest the rest of my tomatoes in this recipe for canning. The smoked paprika gave me a bit of a stomach ache the next day, and "roasting" the tomatoes created a mess in the oven. Who knew tomatoes gave off so much juice when roasted?

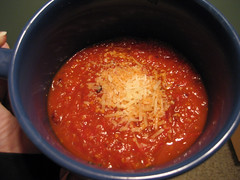
If you have an excess of tomatoes, give this recipe a shot. I recommend adding some white beans for a more hearty texture and a little cheese on top for extra flavor.

Roasted tomato soup

Monday, August 24, 2009

Corn Mirai (Me-RYE)

Each year Park's Seeds touts that they offer the "latest and greatest" sweet corn on the market. Last year it was Sugar Buns, and this year Mirai. We have taken their advice every year and were never disappointed, but this year was exceptional. Mirai is the sweetest, juiciest corn ever. We have shared it with many friends, and they all agree that this is the BEST corn they have EVER tasted.

Corn Bicolor Mirai

We don't have much left - maybe two more meals worth, and I am seriously upset about it! Since Mirai has to be harvested by hand, it is best suited for the home garden and not for commercial production, so when it's gone, it's gone.

If you try corn in the home garden, be sure to sow at least three 9' rows; otherwise, you will not get adequate pollination and your ears will not fill out. Mirai is ready for harvest when the silks become brown and brittle. You are going to get worms, but don't worry - they don't eat much, just an inch or so from the top of the cob. Just snap the top off and go about your merry way. Boil for THREE MINUTES only - any more and you're cooking the sweetness out of this gem!

Friday, August 21, 2009

Eggplant Rollatini

The eggplant are coming in fast, and we're trying to get creative with our cooking to keep from growing bored. I recently had a delicious dish at a Greek-style restaurant called eggplant rollatini, so we tried our hand last night at recreating it. Spoiler - it turned out fantastic!

eggplant rollatini

Ingredients (serves 2-3)

Two long Japanese eggplant or one big fat American eggplant (as our Indian friend calls them)
1/2 sleeve of finely crushed saltines plus a little extra salt
2 well-beaten eggs
Olive oil
1/4 carton ricotta + 1 egg + salt and pepper

We only grew Japanese eggplant this year, which look like this. You can also use regular purple eggplant if you can't find japanese. Your pinwheels will just be bigger!

eggy blonde

Slice the eggplant length-wise as thin as you can get them. You are going to be rolling them up into little pinwheels, so they need to be thin.

making eggplant rollatini

Ian is a magician with that knife! No need to remove the skin or soak them in salt like you may have been taught in the past.

making eggplant rollatini

Dip each eggplant slice into the beaten egg, making sure to cover the entire slice, even the sides.

making eggplant rollatini

Roll the slice in the cracker crumbs. Make sure you get it covered all over.

making eggplant rollatini

Carefully lay each slice in hot olive oil, allowing each side to get nice and crispy. The oil needs to be good and hot at this point so you get a lovely golden finish to the breading.

making eggplant rollatini

Mix together the ricotta, egg, salt and pepper.

making eggplant rollatini

Spread a thin layer of the mixture on one side of each slice of fried eggplant. Don't get overzealous with the amount of ricotta you spread on each slice - a little goes a long way.

making eggplant rollatini

Starting from one end, roll the slice up into a tidy little pinwheel.

making eggplant rollatini

Place all pinwheels in a lightly greased baking dish.

making eggplant rollatini

Cover with your favorite pasta sauce, mozarella cheese and some fresh tomatoes if you've got them.

eggplant rollatini

Bake at 350 for 25 minutes.

eggplant rollatini

Serve over pasta, and with some sweet corn. So yummy! Prep time was about 40 minutes, with 25 additional minutes for baking.

Thursday, August 13, 2009

Banana Peppers

I harvested 21 banana peppers this morning, and I didn't pick them all!

banana peppers galore!

They're pretty, but I'm not sure what to do with them all. I pickled some up for my FIL last week. I guess I'll pickle these up to. If you've got suggestions, I'm all ears - well, actually, I'm all peppers.

Tuesday, August 11, 2009

Garden Grown Salsa

I have been in the kitchen making salsa again! This year has been a little different though since all the salsa ingredients are fresh from the garden! In the past we have had to purchase the garlic and onions, but we grew our own this year.

salsa ingredients - all home grown

I noticed that our onions are a lot stronger than store-bought. You only need 1/4 of an onion for my standard recipe instead of 1/2 onion. It might have something to do with the fact that our onions are yellow and store-bought are white - I'm not sure. Also, our garlic is much bigger than the garlic we get at Ingle's. I scaled that quantity back too!

It certainly tastes better than it looks!

fresh salsa

Monday, August 10, 2009

Growing Onions and Garlic

Onions

I tried my hand at growing onions this year from bulbs. Two years ago I attempted to grow onions from seed, but I started the seed outdoors, and they are just so fine that they got mixed in with weeds, and everything went to pot. (Is that still a phrase? If so, what does it mean? Is it bad to be a pot?)

I planted the bulbs in March directly in the garden, and we started harvesting them in late July.

Once the green stems started turning brown, I bent the stems over at the base and dug out around the bulbs to promote bulb growth, as they were not growing wide like a yellow onion you would purchase in the store. Bending the stem is supposed to focus all energy to the bulb and away from the foliage.

onions

When the bulbs appeared to stop growing, I used a shovel to gently lift them from the ground. You need to avoid puncturing the outer skin, or they will not cure properly. I then placed the entire bulb in a dry, shady spot with good ventilation to cure for two weeks.

onions curing

They are finished curing when the roots are dried out and the outer skin is papery. The foliage can be cut off and the onions stored in a cool dry place for future use. I'm told you can store onions up to 6 months. I have also read that you can use old pantyhose for storing onions. Place an onion in the hose, tie a knot, then place another onion until you have used up the entire leg of the pantyhose. Hang the whole thing in a cool dry place. I'll probably give this a try to keep the onions from touching each other and possibly rotting.

Garlic

Two autumns ago my MIL and I answered an advertisement from a woman offering people to dig free plants from her yard. I can't imagine who wouldn't answer this ad! Among the many plants I procured from her garden were four garlic starts. She must have grown them from bulbils, because they were very small and not ready for harvesting until this year - almost two years later.

There are many different types of garlic, and I have no idea what type I grew. The stem reached over three feet tall and had a big head of small bulbils (often mistaken for flowers, but with a strong garlic odor).

I dug it up the same way as the onions, taking care not to puncture the skin, and dried it on the same window sill.

garlic from the garden

I'm going to try to propagate garlic from the bulbils and from a single clove. I have read that the bulbils take two years from planting to harvest, but planting a single clove should take just one year. This is all highly scientific as you can tell.

Friday, August 07, 2009

Surrogate Color

When the blue blossoms of Baptisia fade, a gap of colorless space is left in the perennial garden. To remedy this, I use morning glories to fill in where Baptisia left off.

morning glory filling in color

Beware - you have to keep this annual under control. Morning glory has much ambition and will dominate an area if left unchecked. Allow her to casually ramble among your Spring-blooming perennials during Summer, but keep her pruned back to prevent her from strangling the other plants.

Morning glory will reseed year after year and become even more ambitious in the process. Be sure to thin out the vines when they are young, as they can be difficult to remove when long strands have wrapped around each other and anything else in the vicinity.

I have never actually sowed a morning glory seed. This plant was transplanted from volunteers that sprung up three years ago in the front yard. I suppose a bird "put" it there!

Thursday, August 06, 2009

Fuchsia Planters

I have been very happy with the concrete planters this year. I paired Firecracker Fuchsia with red begonias and accented the planting with a green-gray variegated ivy and corkscrew grass.

fucshia in planters

The fuchsia didn't bloom all that much, but I really like the pink and green-gray foliage regardless of the flowering traits of the plant. The whole arrangement just feels calming to me, and the pale foliage accented with burgundy streaks complements the colors of our house very well.

fucshia in planters

Last year's planting of coleus and sweet potato vine was just too dramatic for this area, which requires a warmer, softer tone to blend well with the gentle feeling of the roses and other English cottage garden plantings.

coleus and sweet potato vine

Wednesday, August 05, 2009

Bountiful Harvest

The garden made it through our absence in excellent condition, and our neighbors all enjoyed the squash, cucumbers, green beans, banana peppers, tomatoes and corn. I admit that I was jealous not to get the first of the tomatoes and corn, but it was well worth waiting for.

There are still plenty of tomatoes ripening on the vine.

marcellino tomatoes on the vine

We'll be enjoying fresh tomatoes for at least the next three weeks.

costuloto tomatoes on the vine

The eggplant have just started coming into season, so we'll have plenty of those for the next six weeks! Lock your doors and keep your windows closed unless you want your house to be filled with eggplant while you're away! We always have a ton of them!

eggplant on the vine

I can't believe how many banana peppers a single plant produces! I put some in vinegar last night for my FIL, as he LOVES them on his pizza. Park's Seeds sent us a packet of these seeds for free with our Spring order. Thanks Park's!

banana peppers on the vine

We'll probably get another half dozen cucumbers, but they're pretty much spent.

cucumber on the vine

The green beans are working on a second round. These beans have not been my favorite, and I won't plant them again next year. I like the bush habit of these beans (no staking or trellis required), but the beans get tough way too soon, and when they get tough, they are inedible. These are tenderette green beans from Park's, but they haven't lived up to their "tender" name.

green beans second crop

And of course there's the corn! The first planting was pretty much devoured in our absence, but we have a second crop that should be ready mid-week next week. I had one piece over the weekend, and holy cow - it's so good!

corn ready for the pickin'

Sadly, the squash are about done. It's getting too hot for them, and the squash borers are taking them down. Not only are they getting worms in their fruit, but also in the plant itself, and once you get a worm in the plant, it withers and dies pretty quickly.

squash in august

I need to get to planning what I want to sow after all the squash have finished up their work. It's a tricky time of year, because it's too hot for the Fall crop, but there isn't really enough time for a Summer planting. Maybe some Winter squash? I'll look into it!

Tuesday, August 04, 2009

Garden Helper

I noticed our first toad in the garden today. Look at his cute little fat body. I just wanna hug him!

toad in the garden

Toads are an incredible blessing to a garden, as they eat thousands of insects that want to chow down on your plants. I have never been able to attract toads in the past, so I was surprised this morning to find him.

Since toads breathe through their skin, it is especially important to stop all use of insecticides and chemical fertilizers, as they will harm these cute little charmers. They do like to have a clean water source nearby, so I think I'll put a little dish of water up in the garden for him.

Maybe I should get him a toad house too, so he'll stay a while!

Monday, August 03, 2009

A Treat for the Senses

Our Asiatic lilies put on a lovely show this year. They grew to over 3' tall and no less than four blooms topped each elegant stem.

lovely summer lilies

The white flowers are so pure and tender. I love how those little brown dangly bits dance in the breeze.

lovely lilies

These freckled flowers add a little spunk to the otherwise subdued planting.

stargazer lily

The delicate blush of pink on these delightful blooms blends well with the surrounding plants.

lovely lilies

Not only are they beautiful, but they are also big and carry a big scent. I balanced the blooms atop these shallow round vases, giving just enough room for their stems to reach a drink of water.

lily with granny's doily

The sweet aroma filled the entire house, and the blooms lasted an entire week like this. I have never been a fan of perfume, but if they could make perfume that really smelled like these flowers, I would wear it all the time!

lily with granny's doily