Friday, May 30, 2008

Tumbling Tom

I sowed these yellow tumbling tom tomatoes indoors in February and transplanted them two weeks ago after hardening them off for several weeks. They took off growing from the start!

tumbling tom tomato plants

There is already a baby tomato growing on one of the plants.

tumbling tom tomato

When you grow cascading tomatoes, you do not pinch off the extraneous shoots that grow between the main stem and side shoots. When you grow staked tomatoes, you do pinch off these shoots to ensure the plant has only one main stalk. This helps focus the energy toward fruit production and away from producing stalks. This is not necessary with cascaders, because they are not expending energy growing upward, but outward. You want a big bushy cascader filled with fruit!

Labels: , , ,

Wednesday, May 28, 2008

2008 Perennial of the Year

Each year the Perennial Plant Association names a perennial for that year based on the following criterion:
  • Suitable for a wide range of climatic conditions
  • Low maintenance
  • Pest and disease resistant
  • Readily available in the year of release
  • Multiple season of ornamental interest
  • Easily propagated by asexual or seed propagation
This year's selection is Geranium Rozanne, a lovely violet-blue hardy geranium introduced in 1989 in Somerset, England. Rozanne blooms from mid-Spring until the first frost on sturdy yet delicate stems 20" in height and prefers full sun to partial shade growing conditions.

rozanne geranium

I was happy to have been given a start of this lovely plant from my friend Chleone's garden last Summer. Although I planted just one small sprig of Rozanne, she was in lush bloom by mid-Spring.

rozanne geranium

Bluestone Perennials is offering Rozanne at a special price this week, so act quickly!

One thing to note with Rozanne, is that you need to cut it back after flowering. This can be difficult to do since it feels like you are "killing" the plant, but it actually stimulates new growth and more flower production. So, be liberal with those sheers!

Labels: , ,

Thursday, May 15, 2008

The Crops are Sowed

Well, most of the crops are sowed at least ...

This year I waited until Mother's Day to transfer my tender veg like tomatoes, peppers and squash to the garden. Last year I transferred plants based on the presumed final frost date, and I had to scramble to cover the plants 3 times for fear of freezing temperatures killing them off during cold nights. Tender veg is not supposed to be transplanted to the garden until night temperatures can be relied on to stay above 55 degrees. Here in Asheville, that would mean I couldn't plant things until the middle of June, or maybe later! I decided the plants could just suck it up and withstand a couple of low 40's nights like we have been having this week. Hopefully next week will bring warmer weather, but you never can tell in the mountains.

garden view mid-May

The bottom right bed contains peppers, green beans (the bush variety) and four types of squash; two yellow squash and two zucchini. Only four out of sixteen squash seeds that I sowed indoors in March actually germinated, so I had to direct sow the remaining twelve.

squash and green peppers

One of the yellow crookneck seeds germinated within days of sowing, and by the time I was able to transplant it to the garden, it already had fruit on it! I had to hand pollinate this little guy while it was still in its container hardening off.

baby squash

The top right bed is the most fertile since it used to be the location of the burn pile. This bed is growing five types of tomatoes and sugar snap peas. We are using grass clippings this year as mulch. I read in Mother Earth News magazine that grass clippings not only act as a mulch to preserve moisture and subdue weeds, but as the clippings break down, they also provide fertilizer to the plants. As a side note, this is a great publication, and I recommend it to everyone, even if you're not a gardener. The magazine contains many interesting and useful articles that can be applied to every day living situations. It's currently my favorite magazine.

tomatoes mulched with grass clippings

The collars around the tomato plants are just paper cups with the bottoms cut out. These collars serve several purposes. First, they help protect against cutworms that will topple young seedlings when they are first transplanted into the garden. And secondly, they help protect the seedlings from harsh winds and extreme temperatures (hot or cold). You should always harden off your plants before transplanting them into the garden, but the paper collars go one step further and add continued protection. I will remove the collars after one week if the plants look sturdy enough. I will also stake the plants when I remove the collars.

young tomato plant

The top left bed is growing lettuce, spinach and soybeans. The eggplant will also be transplanted into this bed when they have hardened off.

lettuce spinach and soybeans

Soybean seedlings have a really neat succulent-like texture. These soybeans are the type you use to make edamame. Yum!

soybean seedling

The bottom left bed is growing corn. You can see that I have sown two and a half rows of corn. I will sow the other two and a half rows in two weeks so we have a longer supply of corn than we did last year. We ran out too early!

corn and marigolds

In order to help keep our rows of crops straight, we marked the beds at 12" and 6" intervals with a tick and a dot.

raised beds

We then tied a 9' length of twine to two stakes to create a planting guide. By inserting each stake at the same marker on opposite sides of the bed, we are able to easily measure off our rows and ensure the crops will be planted in a straight line.

planting line

You may have noticed the twigs and leaves scattered throughout the garden in the photos. This is the result of the terrible high winds we had Sunday and Monday. The winds were so bad that my stomach ached worrying about all the tender seedlings. They all made it through just fine though. I used a garden cloth pin to loosely stake the large squash plant to the ground since the wind was catching its leaves like a sail and thrashing it from side to side. It's still a little beat up, but I think it will survive!

Labels: , , ,

Wednesday, May 14, 2008

Attack of the Aphids

The past four weeks have been a constant battle between me and the aphids. The aphids want to feast on the leaves of my knock out roses, leaving them bare-branched and naked. I obviously don't want the aphids to do this. Seven out of twelve of the bushes are infested. Four of them are critically infested and suffering severely from their wounds.

Here is a shot of aphids trying to take down some fresh rosebuds. They prefer the fresh growth, because it is more tender and therefore easier to suck the "juice" from.

aphids on knock out roses

I had gone through four bottles of Garden Safe organic insecticide, but the aphids still seemed to have the upper hand. I almost gave in to a moment of weakness as I spotted a bottle of Sevin at the check-out line at Lowe's. Do I love my roses enough to torture the environment with such a harsh chemical as carbaryl? Luckily, I was distracted by an alternative 2-in-1 fertilizer / insecticide produced by Bayer (who also markets Sevin). I remember Linda Cobb mentioning that she uses this product in her own rose garden, so I decided to shell out the $12 and give it a try.

rose feed and spray

The active ingredient in this product is disulfoton, which targets "sucking" insects. Sucking insects are the bad insects, because they are the ones that suck the life out of plants. Be sure to read the warnings on the label, because until the soil is dry, this product is toxic to humans and pets. I also learned that it is toxic to birds, which really makes my stomach turn, because we do have some birds that like to romp around under the roses. I really hope they are playing in someone else's roses today.

The product is in granule form, and claims to protect and feed for 6 weeks. I got up early this morning to work in my rose garden and sprinkled one cap full per rose bush (as directed), worked the granules lightly into the soil and gave the roses a good watering. Even if this product works, I will not reapply it in 6 weeks, but use a regular fertilizer instead. I just don't like putting harsh chemicals into the soil, and aphid season should be finished up by then. This product was a last ditch effort at controlling a critical aphid problem, and I admit that I am somewhat ashamed to be using it.

As I was applying the new product, I noticed that the aphid problem seems to be subsisting quite a bit, but that the roses are now covered with a new kind of bug - a six-legged black and orange insect with a hairy-looking body.

ladybug larva

These bugs are ugly, so they must be bad, right? After consulting the trusty Internet, I found that these are ladybug larvae! There is no scene more pleasing in the garden than a slew of ladybugs. I bet they have been having a good old time munching away on the smorgasbord of aphids provided by my roses!

With the help of the ladybugs and insecticide, I think I finally have a handle on the aphid problem. I just hope the insecticide doesn't kill the ladybugs too. I'm not sure if ladybugs eat dead aphids, and if so, will the dead aphids pass the toxins on to them. I have not been able to find information on the Internet regarding these questions. If anyone has insight into this, please do share.

Labels: , , , ,

Tuesday, May 13, 2008

Blooming Bearded Irises

I have to admit that I am pretty much addicted to bearded irises. When the rhizomes start to go on sale in the Fall, I find myself buying one every where I see them. Since these beauties multiply so rapidly, I am starting to get overloaded with irises! That's ok though. I have plans for them.

I added these gorgeous yellow irises to my collection last Fall, and they were the first ones out of hibernation this Spring.

llow irises

Although they appear to be as delicate as tissue paper, the blooms are quite hardy. They took a serious beating over the past two days with 30mph winds. Although they aren't quite as perky as the first day of blooming, I am impressed with their fortitude.

yellow iris

I accidentally knocked one of the blooms off the stalk when I was staking them, so I put it in this cute little cordial glass. I have it sitting on my desk during the day so I can enjoy the sweet scent.

yellow iris

Some of the purple blooms are starting to open too. I really like the contrast of purple against yellow.

purple iris

Bearded Irises are easy to grow in full sun. They require little water and a modest amount of fertilizer. If you cut the stalks back after blooming, they often send up a second wave of flowers in the Summer. Be sure to plant them very shallowly - the rhizome should be "just" under the soil. If you plant them too deeply, they will rot. Division can be done in the Fall, and the foliage should be cut back at that time also.

The only problem I have with irises is that they require staking, and because of this, they can become pretty ratty looking. I'm still working out the logistics of staking them without slicing through the rhizomes. I guess I should stake them when I plant them so I will know exactly where the rhizome is located. I'll consider this when I divide and replant them in the Fall.

Labels: , , ,

Friday, May 09, 2008

Spring Munchies

We sowed lettuce, spinach and sugar snap peas in the garden about six weeks ago. These plants thrive in colder temperatures and wilt in the heat of the Summer, so they must be planted and harvested by the end of Spring in our area.

Last year we tried to grow Space Hybrid spinach in both Spring and Fall. Both times were a failure. The seeds germinated successfully, and 2 cute little leaves formed, but then the plants bolted and went to seed prematurely. I was tempted to abandon future attempts, but I enjoy spinach so much that I decided to try a different variety this year, so we ordered Melody spinach from Park's Seeds. I have been very happy with this variety. Although the plants are not completely ready for harvest, we have been snacking on the bigger leaves for the past week. Since spinach is a leafy vegetable, it requires a fertilizer high in nitrogen. I have been feeding the spinach with a side dressing of 10-10-10 every four weeks.

spinach

We are growing the same lettuce this year as last year, Organic Salad Bowl Mix, from Park's Seeds. I like organic lettuce, because the leaves are small and easier to eat than non-organic varieties. It's nice to not have to tear the leaves up when making a salad, and there are no thick stalks in my bowl. Each leaf makes the perfect-sized bite! I particularly like this mix of seed, because there are four different types of greens in the packet. My favorite are the dark purplish leaves. The lettuce is on the same fertilization schedule as the spinach.

organic lettuce

Lettuce and spinach seeds are pretty small, and our soil is rockier than I would like it to be. Since rocky soil is not the optimal growing place for fine seeds, I dug a shallow trough in the soil, filled it with compost and sowed the seeds in the compost. This technique also helps me remember where the seeds were sown, since the compost is darker in color than the surrounding soil, and ensures I actually water the un-emerged seeds and not just the soil around them. Compost is also high in nutrients, so the seedlings had a good start as soon as they began emerging from the ground. When the seedlings had formed their first true leaves, I fertilized them with a shot of fish emulsion to boost their energy. Fish emulsion is a 5-1-1 organic fertilizer .

rows of lettuce and spinach

The sugar snap peas are well on their way to a bountiful harvest. This is the same variety as we grew last year. They are so sweet and tender that we overlooked their low yield and planted them again this year. We were a little late in getting these sown, because we had to rebuild the trellis, but I think they will make it to harvest before it gets too warm. Peas are legumes and are "nitrogen fixers," which means they put nitrogen into the soil instead of taking nitrogen away like other plants. Since the peas do not require a high nitrogen fertilizer, I am using a 5-5-5 fertilizer on them every four weeks.

row of sugar snap peas

I am going to be planting tomatoes, squash and green peppers and sowing the corn this weekend. Although we have a couple nights in the high 40's ahead of us, I have been hardening off the plants for three weeks now, and I think they are tough enough to withstand a couple of cooler nights.

Labels: , , , , , ,

Thursday, May 08, 2008

Herb Garden

Last weekend was Herb Fest at the WNC Farmer's Market. Ian and I had been wanting to rebuild the herb box that is located off the side of the deck for over a year. The original box was built by a previous owner from railroad ties and was falling apart. Since Herb Fest was closing in quickly, we knew we needed to make our move.

We headed off to Lowe's for a lumber run. We purchased five 2" x 10" x 8' boards, borrowed our neighbor's table saw and whipped up a new herb box in no time flat. OK, so it wasn't really that easy ... First we had to dig the soil out of the old box, then we had to remove the remnants of the broken down box, and finally we were able to begin construction on the new box. And of course the silly box we built was too tall for the location, so we had to plunge it 6" into the ground, mix some peat into the old soil and then fill it up. The project took a lot longer than I thought it should, but the outcome looks great.

the new herb box

In case you're interested in the technical side of the herb box, here is how we built it. We cut one of the 2" x 10" x 8' boards into four 2-foot lengths. We then created two rectangular shaped boxes using one 8' board on the front, one 8' board on the back, one 2' board on the left and one 2' board on the right. We connected the boards using 3" screws just like we did the garden boxes. We then positioned one rectangular box in its place on the ground (the bottom layer) and balanced the second box on top of the first (the top layer). We used left over boards from the garden bed project to fasten the two layers together by positioning a piece of the remnant lumber so that it spanned the top and bottom layer, then screwing into the top and bottom of the board so it would hold the two layers together, sort of like a brace. We used two brace boards on the front, two on the back, and one on each side. These braces are on the inside of the box, so they are not visible.

We had a blast at Herb Fest. There were a lot more herb vendors this year than last, and we were impressed with the selection of plants. Ian loves to cook with fresh herbs, and he had a good idea of the herbs he wanted, but we also bought some herbs we have never used before, like Thai Basil and Lemongrass. We spent a little more cash that day than I thought we would. The herbs cost between $2-$4 each, which doesn't seem like much until you tally up your total bill at the end of the day!

I know I planted the herbs a little closer than I should have, but I had to make them all fit somehow!

the new herb box

The Thai Basil is decorative and has a sweet spicy scent. I am excited to sample this in a curry of some sort.

Thai Basil

This is a weeping Rosemary that should cascade over the side of the box. I love the scent of Rosemary - it's like a little whiff of Christmas.

weeping rosemary

The current challenge is keeping the dog from launching off the herb box into the yard. He likes to use the box as a catapult. I might need to put up a temporary little fence until the herbs are tall enough to deter his bad dog behaviour.

I also plan to create a little flower bed in front of the herb box to further deter dogs (and people) from stepping off the herb box. I think the previous structure would have lasted longer if people hadn't used it as a step ladder. Hopefully some flowers down below will keep trespassers off the box!

Labels: , ,

Wednesday, May 07, 2008

Shade Garden

The "shade garden" was originally meant to be a fern garden, but it houses so many other types of plants now that it has been reclassified. This site is in full shade, except for a very small dappling of sun in the early morning. I chose a lot of white flowering plants since white blooms show off nicely in shade. This garden is also very lovely in the evening when the white flowers are glowing like stars against the dark background.

shade garden

This japanese painted fern is from Lowe's. I purchased it last Summer, and although it looked pretty ratty when I bought it, it has recovered nicely. It was only $6, so I gave it a shot and was glad I did. This type of fern dies back completely in the Winter and sends up new fronds in early Spring. The white strokes of "painted" color on the fronds help this beauty really stand out in a shaded spot.

japanese painted fern

I love the delicate lacy fronds of this maidenhair fern. I purchased this fern from the Jesse Israel Garden Center two weekends ago. I am not sure if this fern is going to be winter hardy in our zone, but since we have several "micro-climates" in our yard I am hoping it will survive. This fern requires a moist location and prefers some peat added into the soil when planting.

maidenhair fern

This is my 5th attempt at growing polemonium (ie, jacob's ladder). My first four attempts were in mostly sun, and all four plants died, so I am hoping this full-shade planting will be a better fit. This is a blue polemonium surrounded by white impatiens. Blue probably isn't the best color choice for this garden, but I just couldn't resist giving polemonium another try.

polemonium

This solomon's seal was transplanted from my friend Chleone's garden late last Summer. It has multiplied very quickly and seems to enjoy its new home.

solomon's seal

A close up view of the solomon's seal blooms. This plant has been blooming since early April.

solomon's seal in bloom

This white bleeding heart will die back in mid-Summer, so I planted some caladium bulbs around it. The caladiums should be mature by the time the bleeding heart begins to fade.

white bleeding heart

I purchased a lot of ferns from Greenwood Nursery last Summer but was very disappointed by the plants. I purchased three potted ferns (two japanese painted and one autumn brilliance) and 20 bare root lady ferns. The bare root ferns looked dead when I planted them, and at the end of the growing season, none of the plants had emerged from the soil. Also, the two japanese painted ferns died within a month of planting. Currently, the autumn brilliance fern is still alive, and two tiny little fronds are emerging out of the 20 lady ferns I planted. I ended up paying $65 for three ferns. I think I got a little ripped off on this deal. Yes, they do have a guarantee on their plants, but you have to wait one year before declaring bare root ferns dead and you have to pay shipping on the replacement plants. It would cost me $24 to replace these plants. I would rather just buy new plants from a local garden center than go through the hassle of replacing these with plants that might suffer the same fate. I have learned my lesson on that one.

I still have a vole problem in the fern garden. I need to spray the area with the vole repellent I bought last year. It seemed to help a little bit. I was hoping the little guy would change his residence to the compost pile, but he really seems to like being close to the house!

Labels: , ,

Tuesday, May 06, 2008

Spring & Summer Containers

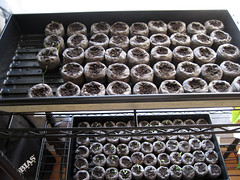
Although it rained this past Saturday, I was not deterred by the inclement weather, but managed to get most of my containers planted for Spring and Summer. I gained much inspiration from the Biltmore Estate's beautiful containers and the book Containers from my friend Punchy.

Last year I planted Limoncello Petunias in my hanging baskets. I had grown the petunias from seed, but I was not impressed with the plants or the arrangements. This year I decided to be a little more bold and try to create a Proven Winners arrangement worthy of blogging about. I found a slew of Proven Winners flowers at the Horticulture Society plant sale at the Farmer's Market and chose purple, white and yellow annuals to complement the perennial planting combination in the front flowerbox. The flowers for each basket cost about $14.

Priscilla Supertunia is a lavender double-flowering petunia with dark purple veins. Yellow Chiffon Superbells brings non-stop color from Spring until frost. Giant Snowflake Snowstorm provides lush green foliage dappled with sweet little white blooms reminiscent of strawberry flowers. The plants are still small, but I am confident they will fill out the baskets beautifully by the end of May, especially once I start hitting them with some Miracle Grow once a week. I planted Proven Winners superbells last year in one of my other containers and was happy with the results.

spring hanging baskets

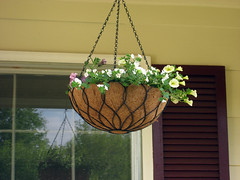
I really like the soft airy flow of these arrangements and the contrast of the dark purple against the yellow and white.

spring hanging basket

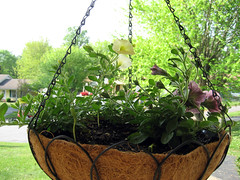
As a side note, I could not find adequate replacement coconut liners this year for my hanging baskets and had to purchase new baskets altogether. The only replacement liners I could find in stores are the non-molded flat round liners that look really crappy when you try to cram them in the basket, because they overlap and look bulky and unprofessional. We can't be having unprofessional looking baskets on my front porch! Furthermore, when these liners get wet, they fray and fall apart. In past years, Lowes and other stores have sold the replacement liners that are molded to fit the baskets perfectly. Next year I will buy them on-line!

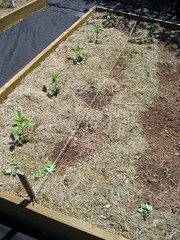
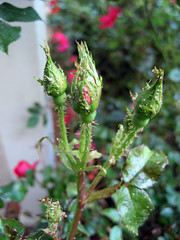
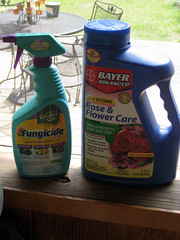
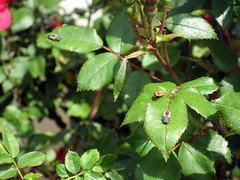
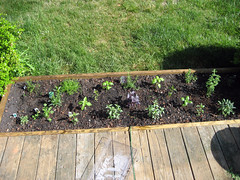
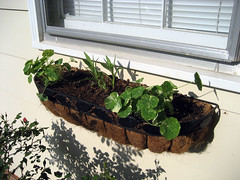
My smaller side window box is a bit less interesting this year but will serve an important purpose - helping to keep aphids off the roses! I planted yellow coreopsis and orange nasturtium in this box. The coreopsis brings nice height to the center of the arrangement, and the nasturtium will cascade over the sides to provide some additional interest. I love the modeled foliage of these nasturtium. Furthermore, aphids LOVE nasturtium, and I am hoping these plants will act as a decoy to keep aphids away from the roses. I am getting tired of spraying down those roses already, and it's only May! This planting cost about $10 total.

side flowerbox

My two cement planters on the front porch get a little bit of morning sun, but enjoy the cool shade for the majority of the day. In the past, I positioned these planters at the front of the porch, but I decided to move them back against the wall this year since the roses have grown to be so large. I like the new position.

spring flowerbox

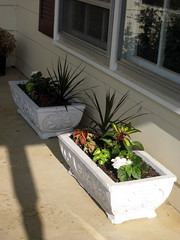
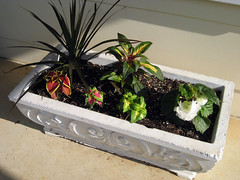
I chose white begonias, orange (new guinea) impatiens, (wizard's mix) coleus and draceana for this planting. The begonias will cascade over the side of the box, bringing a full lush display of glossy green foliage and large white flowers. The impatiens will not only provide lovely orange blooms but add some interest with their multi-colored foliage and red veins that helps complement the habit and color of the dracaena. The dracaena (the spikey plant) adds a tall focal point to the planting, and the multi-colored coleus helps tie the colors and varying habits of the other three plants together. All of these plants are still very young and small and will eventually fill in the box to the point of overflowing. I was concerned that these two boxes are too disjointed from the style of the roses and other containers, but I decided I really like this contrast. Continuity is important, but you have to add a little spice to keep people on their toes too! The plants for each of these containers cost about $7.

spring flowerbox

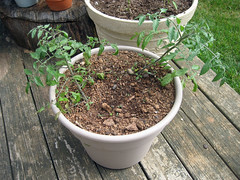
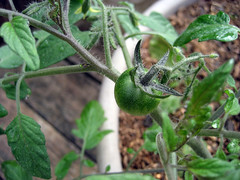
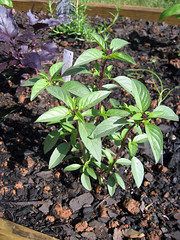
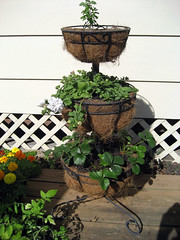
The three-tiered planter is sporting calamintha in the top tier, pink and white double petunias in the middle tier and strawberries in the bottom tier. Although we did not get much fruit from our strawberries last year, I just had to try again! Besides, these plants were only $1 each at the Farmer's Market, so I couldn't help myself. The plants for this container cost about $15.

three tiered planter in spring

I also put together an arrangement on the back porch with coleus, sweet potato vine and black elephant's ear, but the elephant's ear bulb has not emerged yet, so the planting is pretty boring to look at.

I had a great time working on these containers and was proud of myself for not spending *too* much money on the plantings. I found some great deals at the Farmer's Market, Lowes and a cute little garden center in Fletcher that I look forward to visiting again soon. I am trying to be economical, but I don't want to trade off quality for value, because poor quality plants are never a good value. Beware of Lowes. Although I do buy some plants there, I do so sparingly when I cannot find what I am looking for at *real* garden centers. There is a noticeable difference in quality between plants purchased from Lowes (or any other department store; ie, Home Depot, Wal-Mart, etc.) and plants purchased from a real garden center.

Labels: , , ,

Monday, May 05, 2008

New Perennial Garden

We are currently working on installing a new perennial garden in the front yard. I have been growing the plants from seed over the Winter, and Ian's brother Trevor came over last week to dig out the sod. (He does yard chores for cash - it's a great arrangement!)

Here is the location of the new perennial bed.

digging perennial bed

We call this area "the triangle." This area is infamous for being a pain in the butt to mow, so Ian is happy we are digging it up! He is glad to never have to mow it again! At first we were just going to put a nice ground cover like purple winter creeper in this area, but then I caught the flowerbed bug and decided I wanted to use this full-sun site to its maximum potential! Leafing through gardening magazines all Winter can be detrimental to the fun of a husband's weekends in the Spring - LOL! Poor Ian.

Rather than spend mucho dinero on plants to fill the new bed, I decided to grow all the plants from seed. I spent an hour at the Jesse Israel garden center in late Winter picking out the perennials I wanted to grow. Not all perennials can be grown from seed, so there is a smaller selection than when you buy plants from a garden center. I decided on verbena, coreopsis, shasta daisies, salvia, purple coneflower, evening primrose and ruber (ie, Jupiter's beard). Since we have daisies growing along the sidewalk and salvia and coreopsis growing in the flowerbox, I wanted to incorporate these three plants in the perennial bed for consistency across the various planting areas. I chose the purple coneflower, evening primrose and ruber because they bring a variety of pinks / reds to the bed which will help tie in with the reds of the knockout roses. The verbena are a trailing variety that will add interesting height variation to the front of the bed, and the lacy foliage will offer a nice contrast to the rest of the plants whose foliage is more solid.

I sowed over 50 seeds in individual peat pots and waited. They began emerging about 10 days after sowing. The bottom tray in the photo holds the perennials.

sowing indoor seeds

After about 2 months they were ready to start being hardened off outdoors. I potted up some of the more fragile-looking plants in plastic containers to give them a better jump start to life.

perennial seedlings

The coreopsis has been the most impressive grower. Although the germination rate is not excellent, I recommend trying this one from seed, as it grows fast and the plants are strong and healthy.

coreopsis seedling

The verbena, shasta daisies, salvia and primrose had an excellent germination rate, though the verbena germinated much slower than the other plants.

The coneflower, ruber and coreopsis had a lower germination rate, but I am still happy with these plants.

We still need to dig some peat into the flowerbed before planting, and I would like to give the plants I potted up some time to form better root systems before planting them. It will probably be another two weeks before we actually get the plants in the ground. I have a lot of other garden chores to finish up though, so I'm not in any hurry!

Labels: , , ,