Wednesday, April 14, 2010

Spring Surprises

The herb garden was covered under several feet of snow this Winter at least four times. I was surprised to find so much green after the snow melted. I expected a brown twiggy mess!

herb garden

The chives are from seeds I sowed two years ago. They finally look ready to eat!

I learned today that parsley is not an annual as I had previously thought, but a biennial. A biennial does not bloom until its second year and then dies. This parsley didn't bloom last year, so I guess it will push out some seed this year and then retire. Although it's a biennial, I didn't expect to see it thriving under all that snow!

parsley survived winter?

The chamomile was the big surprise. This is definitely an annual plant, but doesn't seem to know it. I sowed chamomile two years ago (with the chives), and it reseeded itself last spring. It did not bloom last year, so this is the same plant that survived countless hard freezes and of course a lot of snow.

chamomile survived winter?

I just never know what to expect from plants! It's like they've got a mind of their own ...

Labels:

Thursday, May 07, 2009

Valentino Basil

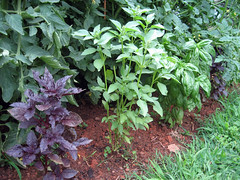
Check out this giant basil I got at Herb Fest this year.

valentino basil

It's huge, and it smells oh so good!

The vendor said it makes great pesto, and you can substitute the cabbage used in pigs in a blanket for basil. Sounds yummy to me!

Labels: , , , ,

Tuesday, September 16, 2008

Lemongrass

I planted this lemongrass in May. It was very small at that time, and I had no idea it would become this big! I think I paid $2.50 for it from the Herb Festival at the WNC Farmer's Market. It makes a handsome addition to this grouping of perennials and annuals, and as the blades are beginning to turn red with the changing season, it is growing more lovely by the day. (As you can see, Norman is taking a pee on the lavender. He has already killed one lavender plant, so I think he wants to even the numbers out by killing one more.)

norman peeing on lavender

Lemongrass is a perennial herb, and is tasty in Asian dishes such as soups and curries. The blades are rather sharp, so you must dice it up finely to release the citrus flavor without slicing your tongue in the process! It also makes a lovely addition to the perennial garden or for use as a focal point in a mixed border. Be sure to give it lots of room, because lemongrass grows large very quickly!

Labels: , , ,

Friday, June 20, 2008

Notes on Herb Gardens

Despite not being able to keep the dog out of the herb garden, the plants are all performing beautifully. They continue to bounce back from his constant trampling, determined to stand up to his mischievous little paws. I persistently reprimand him for his actions, but he conveniently fails to understand my words and goes about his business as usual.
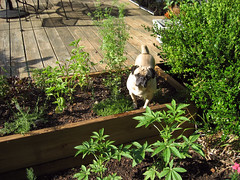
norman in the herb garden

Herbs are actually very easy to grow, and most thrive when neglected rather than pampered. Most herbs are annual plants originating from the Mediterranean, where the soil is sandy and dry and not all that rich in nutrients. Most hybrid varieties that we grow today still prefer the conditions of their foreplants - keep them on the dry side, and don't fertilize. The one exception I have found is chamomile, which prefers a damp soil and will wilt dramatically when the soil shows the first signs of drought.

An annual plant is one that lives for at most one year, with the sole purpose of reproducing. Annuals are like the flies of the plant world - purposed to reproduce and then die. Once an annual produces seed, it dies back and lets its offspring carry on the family line.
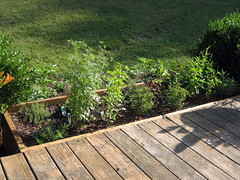
herb garden late spring

Some annuals are intent on producing seed very quickly and must be tended to promptly to help prolong their lives. When annual basil begins to flower, it is wise to pinch the flowers back not only to keep the plant from dying, but also to encourage new growth.

This red rubin basil is determined to go to seed, but I have been quick to interfere with its plans on a daily basis.
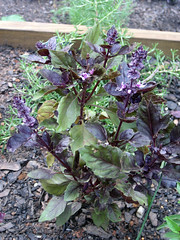
red rubin basil

Pinching the flowers back is very easy and can be done with no special tools - you just need a finger and a thumb. Grasp the base of the flowering stem between your finger and thumb and pinch with your thumbnail to prune off the flowering growth.
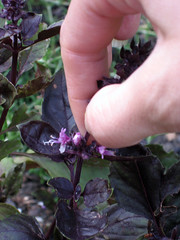
pinching back red rubin basil

This method will actually encourage the plant to produce even more flavorful sprigs.
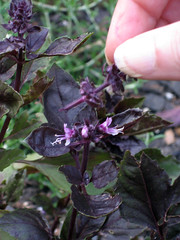
pinching back basil

The plant has not actually "gone to seed" until the flowers begin to produce seed, so you do not have to be too quick to pinch off the flowers. If you enjoy the look of the flowers, you can wait until they begin to fade before pinching them off, as you do with decorative annuals. Shearing off spent flowers from decorative annuals will keep them in bloom longer and promote new bushier growth and more prolific flowering.

Cilantro is one herb that is especially intent on going to seed at an early age. When you are finished harvesting your cilantro or just tired of fighting its desire to flower, let it go to seed. You can then harvest the seeds for use in the kitchen, as this is where coriander originates.
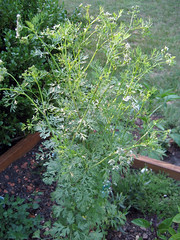
cilantro

Our marjoram has also been insistent that we allow it to flower, but I continue to pinch it back with each attempt.
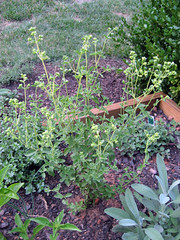
marjoram

We designed a cute little flower garden in front of the herb garden in our attempts to keep the dog out of it, but it has not worked so far. The flower bed contains annual and perennial ornamentals such as cleome, canterbury bells and salvia, and additional herbs such as fennel, lemongrass and lavender.
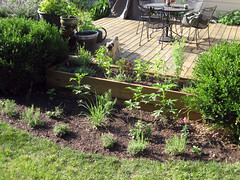
herb garden late spring

I am hoping that once the cleome is taller, he will get the point. Maybe I should have planted some roses here so he really would get "the point" when he launched into the air. Cleome (otherwise known as spider flower for its spider-like blooms) is an annual in our region and grows to 4 feet in height. I grew these plants from seed sown in mid-February. The seeds took a really long time to germinate, and I had actually written them off as a failure after 4 weeks with no sprouts. They surprised me one day when they finally sent up shoots from their long forgotten peat pods. Although they were slow to germinate, the success rate was near 100%.
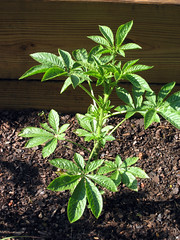
chleome

I sowed these perennial canterbury bells around the same time as the cleome, but they have been much slower growing and have had a lower success rate than expected.
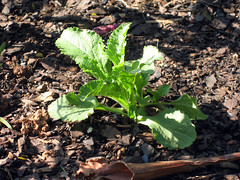
canterbury bells

I found these lavender plants on the clearance rack at Lowe's for just $1 each! I don't recommend purchasing "bargain" plants for an area that you really care about, but these plants looked strong and unstressed. Usually the bargain plants at Lowe's are beyond recovery, but these plants were in perfect condition. When I went back the following week though, they had all but killed the remaining lavender on the bargain rack. I guess that's where they send plants to die.
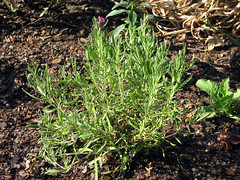
lavender from the sale rack at lowes

We have enjoyed the herb garden very much. We enjoy their decorative qualities, we love to lounge around on the deck taking in their spicy odor, and of course, we appreciate the flavor they add to our dinners!

Labels: , ,

Thursday, May 08, 2008

Herb Garden

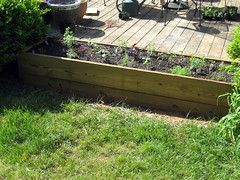
Last weekend was Herb Fest at the WNC Farmer's Market. Ian and I had been wanting to rebuild the herb box that is located off the side of the deck for over a year. The original box was built by a previous owner from railroad ties and was falling apart. Since Herb Fest was closing in quickly, we knew we needed to make our move.

We headed off to Lowe's for a lumber run. We purchased five 2" x 10" x 8' boards, borrowed our neighbor's table saw and whipped up a new herb box in no time flat. OK, so it wasn't really that easy ... First we had to dig the soil out of the old box, then we had to remove the remnants of the broken down box, and finally we were able to begin construction on the new box. And of course the silly box we built was too tall for the location, so we had to plunge it 6" into the ground, mix some peat into the old soil and then fill it up. The project took a lot longer than I thought it should, but the outcome looks great.

the new herb box

In case you're interested in the technical side of the herb box, here is how we built it. We cut one of the 2" x 10" x 8' boards into four 2-foot lengths. We then created two rectangular shaped boxes using one 8' board on the front, one 8' board on the back, one 2' board on the left and one 2' board on the right. We connected the boards using 3" screws just like we did the garden boxes. We then positioned one rectangular box in its place on the ground (the bottom layer) and balanced the second box on top of the first (the top layer). We used left over boards from the garden bed project to fasten the two layers together by positioning a piece of the remnant lumber so that it spanned the top and bottom layer, then screwing into the top and bottom of the board so it would hold the two layers together, sort of like a brace. We used two brace boards on the front, two on the back, and one on each side. These braces are on the inside of the box, so they are not visible.

We had a blast at Herb Fest. There were a lot more herb vendors this year than last, and we were impressed with the selection of plants. Ian loves to cook with fresh herbs, and he had a good idea of the herbs he wanted, but we also bought some herbs we have never used before, like Thai Basil and Lemongrass. We spent a little more cash that day than I thought we would. The herbs cost between $2-$4 each, which doesn't seem like much until you tally up your total bill at the end of the day!

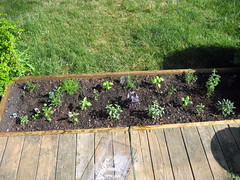
I know I planted the herbs a little closer than I should have, but I had to make them all fit somehow!

the new herb box

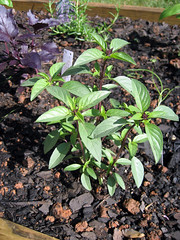
The Thai Basil is decorative and has a sweet spicy scent. I am excited to sample this in a curry of some sort.

Thai Basil

This is a weeping Rosemary that should cascade over the side of the box. I love the scent of Rosemary - it's like a little whiff of Christmas.

weeping rosemary

The current challenge is keeping the dog from launching off the herb box into the yard. He likes to use the box as a catapult. I might need to put up a temporary little fence until the herbs are tall enough to deter his bad dog behaviour.

I also plan to create a little flower bed in front of the herb box to further deter dogs (and people) from stepping off the herb box. I think the previous structure would have lasted longer if people hadn't used it as a step ladder. Hopefully some flowers down below will keep trespassers off the box!

Labels: , ,

Friday, July 27, 2007

Drying Herbs

We have an awesome overabundance of basil and oregano in the garden. I have been pinching back the flowers to keep them from going to seed, but they have been getting more and more persistant with their desire to flower, so I decided it was time to harvest and preserve them. We have been trying to use them in every day cooking, but you can only use so many herbs, and we have a ton of them!

Here are the four kinds of basil we started from seed in late March. There is lemon, large leaf, red rubin and marseille. The seeds are from Park's culinary basil collection.

basil_garden_6_28_2007

I decided to dry them using a method I read about in one of my gardening books. Basically, you put them in the oven on a wire rack on very very low heat (like 80 degrees farenheit) for 24 hours or until they look completely dried out. If you can smell them cooking, the heat is too high. So I went about doing this only to find that my oven only goes down to 120 degrees, and they were baking at this temperature.

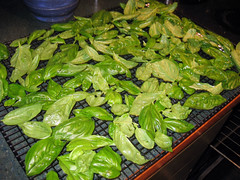
Here is the basil all spread out on a wire rack.

drying_basil_7_2007

Next I tried the microwave method outlined in my book, but that was a real pain! To dry herbs in the microwave, you sandwich the herbs between two paper towels and put them, along with a mug of water, in the microwave on 50% power for about 2 minutes. You have to keep checking their progress and adding more time. There are several problems with this method. First, my microwave resets itself to 100% every time it finishes, and I kept forgetting to set it back to 50%, thereby scorching the herbs. Second, you cannot dry many herbs at a time, because they cannot be touching each other on the paper towel, and you get really sick of hearing the microwave timer ding. This method was not my favorite.

Finally I remembered that we have a Ronco dehydrator stowed away somewhere in a forgotten closet! Duh! We bought it many years ago at a garage sale when we still lived in Mobile. It has only been used once, because attempting to dehydrate things in the thick humidity of Mobile is really quite futile.

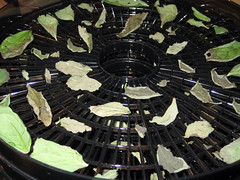
Here are the herbs spread out on one of the trays of the dehydrator. Some of them are already mostly dehydrated from their drying attempts in the oven and microwave.

basil_ronco_dehydrator_7_2007_b

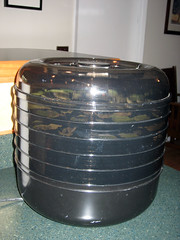
Here is a shot of the dehydrator at work. It really did a great job drying the herbs.

basil_ronco_dehydrator_7_2007_a

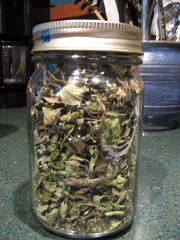
I don't know what we'll do with all this oregano! I guess we're going to be making a lot of spaghetti sauce!

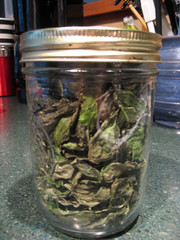
dried_oregano_jar_7_2007

And a ton of large leaf basil.

dried_basil_jar_7_2007

I also dried some lemon basil, but I guess I did it after the photo shoot.

We still have a lot of herbs out there waiting to be preserved. We made some pesto and froze it a couple nights ago. I'll have to get some pictures of the pesto cubes, because they're pretty cool.

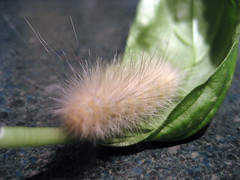
I found this cute little wooly worm on one of the basil leaves.

basil_wooly_worm

I know he's munching away and trying to kill all my plants, but he's just so cute! I released him onto some liriope that I don't much care for. He can eat all of it he wants!

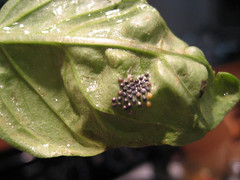
I also found some unsettling eggs on the underside of one of the leaves that caused me to have to check every friggin' leaf on each stem. Eek! I don't want to accidentally dry these guys and end up with them in my dinner. They're still pretty cool, even though they do freak me out...

basil_eggs_7_2007

Labels: , , ,